
How to compare before and after RAW edits with Rylux
Mattia Peretti · November 8, 2026 · 2 min read
With Rylux you can do many things with a RAW file: develop a whole folder in your style, extract a style from photos you love, rate your shots and group the near-identical ones. After any of them the first question is the same: is the result better than the original?
The Rylux editor answers it with four compare modes, a zoom up to 400% and three backgrounds. This guide goes through each of them.
To try the compare modes, join the waitlist: Rylux is in beta.
Before: the RAW as it is
Before shows the RAW file without any develop, so the editor compares your edit with the file itself. After shows the developed photo. Both are in the bar above the photo, next to Split and Side by side.
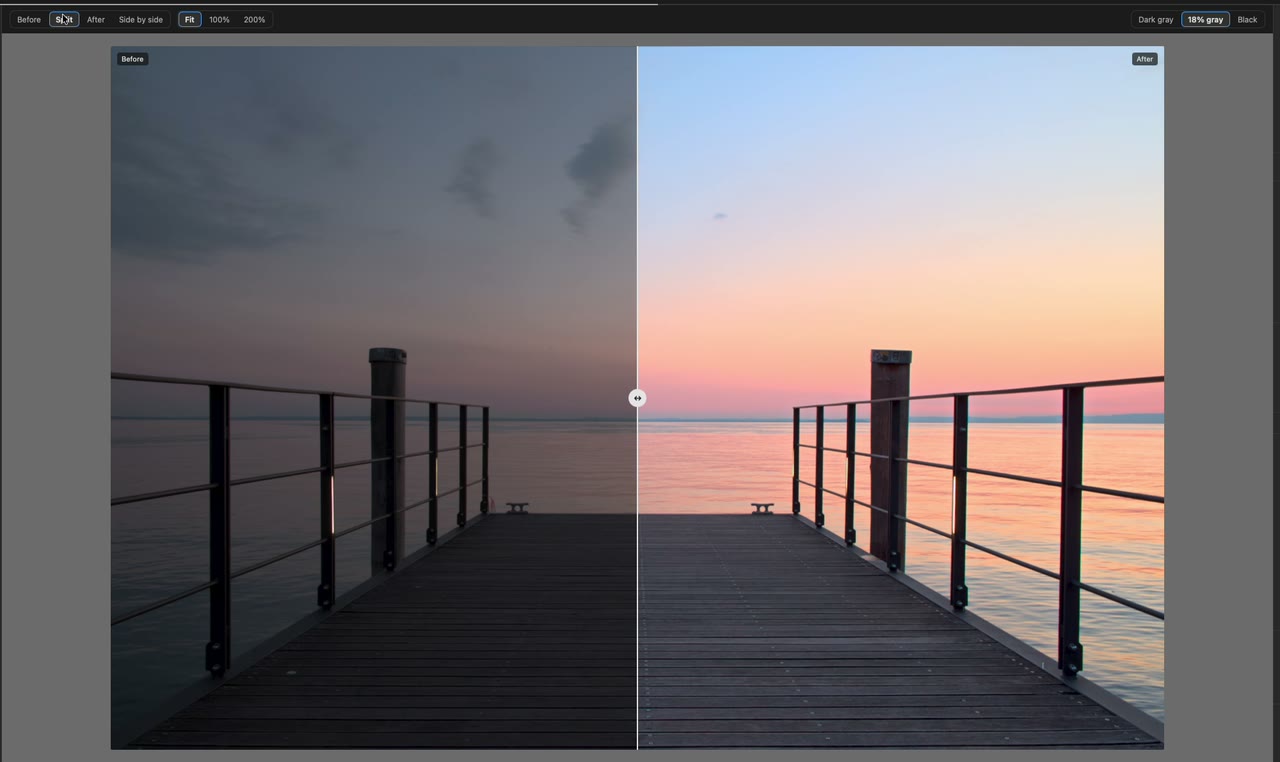
Split: both versions in one photo
Split puts before and after in the same photo, with a line you can move. The Before label sits on one side of the line and the After label on the other. Drag the line across any part of the photo to see the two versions at the same spot.
Zoom: Fit, 100% and 200%
At 100% zoom you see the real effect of sharpening and noise reduction.
Press Z to cycle through Fit, 100% and 200%, or double-click the photo. The mouse wheel and a pinch on the trackpad give a free zoom up to 400%. Drag the photo, or use two fingers on the trackpad, to move around.
Background: dark gray, 18% gray or black
Choose the background that helps you judge the photo. 18% gray is a mid-tone, which makes it a neutral surround.
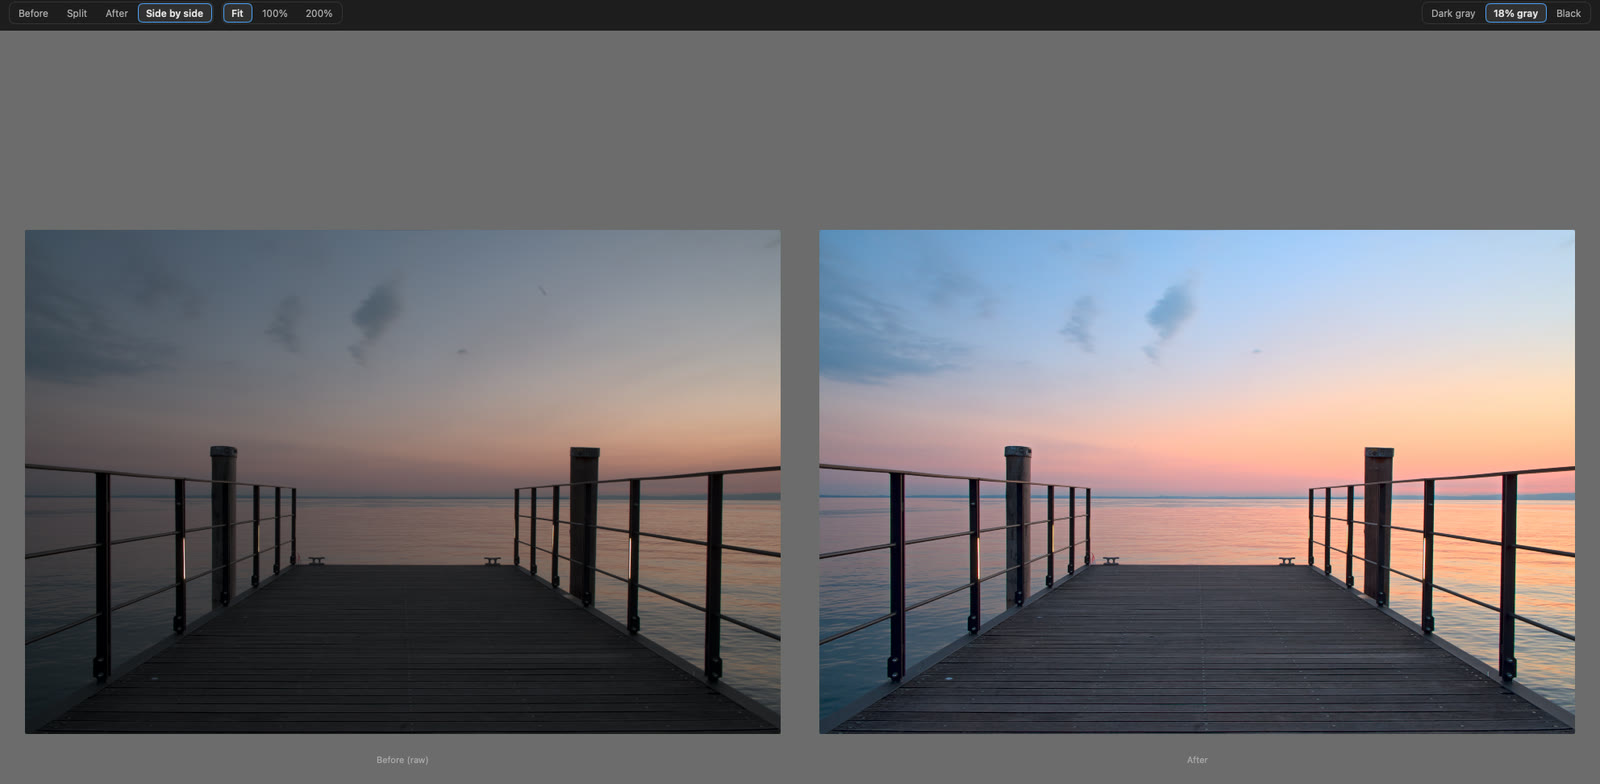
Side by side: before and after next to each other
Side by side shows the two versions next to each other, with the RAW labeled Before (raw) and the developed photo labeled After.
Try it
The compare modes, the zoom and the backgrounds are in the Rylux editor. Rylux is a Mac app that develops RAW files on your own computer, and it is in beta. Join the waitlist at www.rylux.app.